The first time I tried a festive red-white-and-blue no churn ice cream I ended up with a grainy, icy slab that tasted like frozen whipped cream. I wanted a summer showpiece for a 4th of July cookout that actually scooped easily and looked patriotic, so I reworked the approach and focused on two things: a whipped-cream base stabilized long enough to freeze smooth, and a gentle layering method so each color stays distinct. This no churn ice cream delivers creamy, scoopable texture, clear red and blue streaks, and a quick, low-effort process perfect for backyard celebrations.
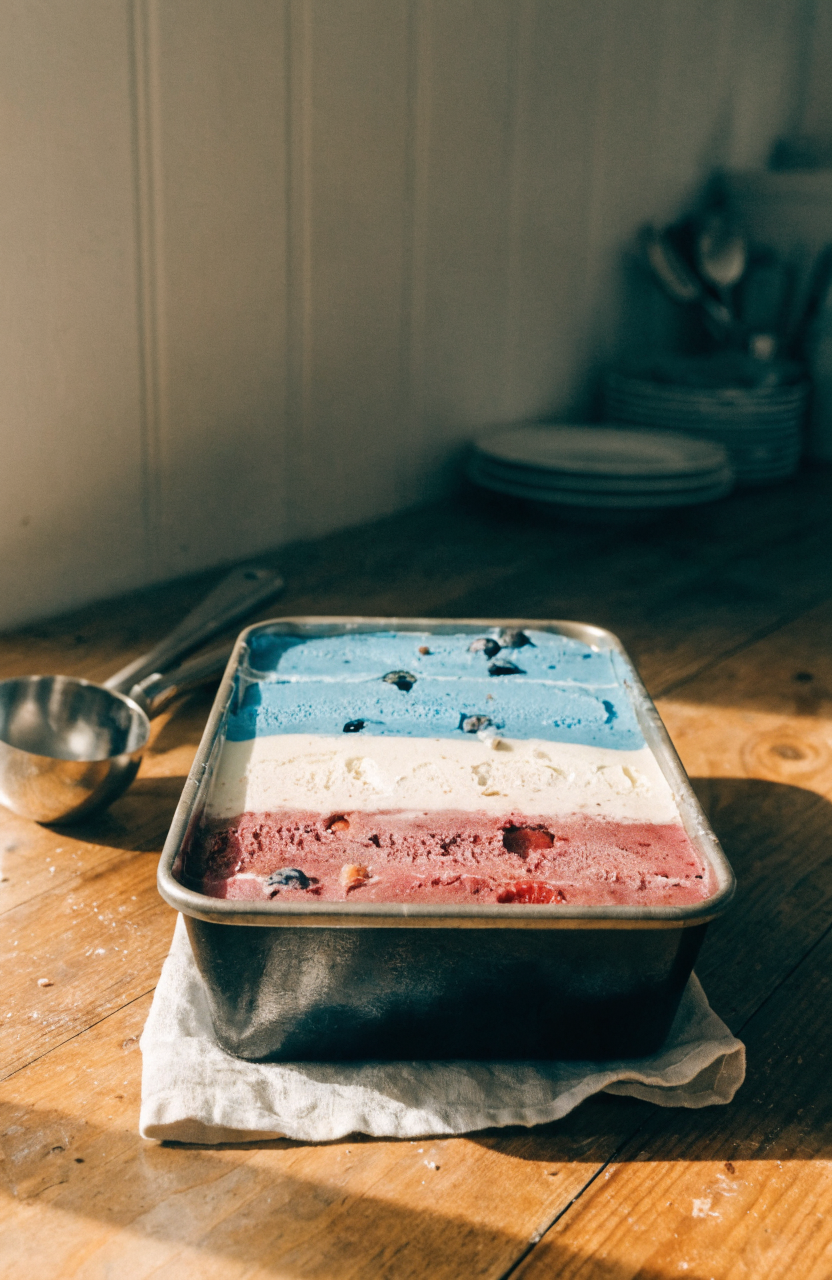
Why this no churn ice cream works
No churn ice cream skips the ice cream machine by relying on whipped heavy cream folded into a sweetened base so air is trapped and the texture stays soft rather than turning into a hard block. The technique I use combines sweetened condensed milk with a little vanilla and a stabilizing trick—whipping the heavy cream to medium-firm peaks and folding it carefully so structure remains. During testing I found that over-folding and adding colors directly to the whole base caused bleeding and an indistinct swirl; what changed was layering the plain white base between measured portions of colored base and giving each layer a quick chill before adding the next. The final method reduces color blending and keeps the ice cream creamy because the condensed milk ratio prevents excess ice crystals.
Key takeaways
- Whip heavy cream to medium-firm peaks to trap air and create a scoopable texture.
- Use sweetened condensed milk as the sweet, creamy base and avoid extra water to prevent iciness.
- Layer colored portions and chill between layers to maintain distinct red, white, and blue streaks.
Ingredients you’ll need and what to substitute
The recipe uses three simple building blocks: heavy whipping cream, sweetened condensed milk, and natural food coloring or fruit purées (for color and flavor). Heavy cream must be cold and well-chilled; that helps it reach medium-firm peaks faster. Sweetened condensed milk provides fat, sugar, and body—don’t substitute evaporated milk because it’s unsweetened and too thin. For the red and blue portions you can use small amounts of store-bought gel food coloring for vivid streaks, or swap in pureed strawberries and blueberry purée for natural color and extra flavor—if you use purée, reduce the quantity slightly and drain excess juice to avoid adding water that promotes iciness.
Realistic substitutions: (1) To cut sugar marginally, use a reduced-sugar sweetened condensed milk—texture will be slightly less smooth. (2) For natural color, macerated strawberry purée (stirred through and reduced on the stove for 5–8 minutes) works for red; for blue, simmered blueberry purée reduces extra water. (3) For a dairy-free version, use a coconut cream base plus a compatible sweetened condensed coconut milk alternative—note texture will change.
Equipment
You don’t need an ice cream maker, but a few items make this reliable: an electric mixer (hand or stand) to whip heavy cream, a 9×5-inch loaf pan or a 9×5-inch freezer-safe container for predictable layer depth, rubber spatulas for gentle folding, and plastic wrap or a tight-fitting lid for the pan. A piping bag or squeeze bottle is an optional shortcut for neat stripes when layering. If you use purées, a small sieve helps remove seeds for a smoother texture.
How to make no churn ice cream
Prep and chill
Start with very cold ingredients: refrigerate the heavy cream, the mixing bowl, and the beaters for at least 30 minutes. Line a 9×5-inch loaf pan with plastic wrap, leaving a 2-inch overhang to make lifting the ice cream easier.
Make the base
Pour the sweetened condensed milk into a medium bowl and stir in vanilla. In a separate chilled mixing bowl, whip the heavy cream with an electric mixer at medium-high speed until medium-firm peaks form—when you lift the beaters, the peaks should hold but the tip will curl slightly. This usually takes 3–5 minutes depending on the mixer and temperature.
Gently fold one-third of the whipped cream into the condensed milk to loosen it, then fold in the remaining cream in two additions. Use a rubber spatula and fold with a cut-and-fold motion so you keep air in the mixture; avoid stirring briskly or over-mixing because that deflates the whipped cream and yields a denser final texture.
Color and layer
Divide the base into three bowls: about 1 1/3 cups each. Leave one bowl plain for the white center. For the red bowl, add gel food coloring a drop at a time until you reach the shade you want; if using strawberry purée, fold in 3/4 cup strained, reduced purée and taste—reduce sugar later if needed. For the blue bowl, use gel coloring or fold in 1/2 cup reduced blueberry purée. If using gel, one to two drops typically gives vivid color without changing texture.
To layer, spread a thin (about 1/2-inch) layer of red mixture into the bottom of the prepared pan and smooth it. Pop the pan into the freezer uncovered for 15 minutes to firm the layer slightly—this short chill helps the next color sit on top rather than blend. Remove and add a 1/2-inch layer of white mixture, smooth, and chill 10 minutes. Finish with the blue mixture and smooth the top. For a marbled look instead of strict layers, spoon alternating dollops and swirl once with a skewer, but don’t over-swirl.
Final freeze and serving
After the top layer is added, cover the pan tightly with plastic wrap (press the wrap directly onto the surface to prevent ice crystals) and freeze at least 6 hours or overnight until firm. For serving, let the pan sit on the counter 5–10 minutes to soften slightly for easier scooping; a quick dip of the scoop in hot water also helps make clean servings. The safe internal appearance is firm but scoopable; no internal temperature is required for this dairy dessert.
Things I learned the hard way
- Don’t over-whip the cream. Over-whipped cream becomes grainy and reverts to butter clumps; stop at medium-firm peaks so the base is airy but stable.
- Color bleeding happens when you pour wet purée into the whole base. Reduce purée on the stove for a few minutes to concentrate color and cut water content before folding it in.
- Too-thin layers blend. Chill briefly between layers so each color sets enough to accept the next without sinking.
- Avoid adding liquid extracts or additional juices after folding; they thin the base and make ice crystals more likely.
- First attempt: I tried folding all three colors together and ended up with murky purple. The fix was strict portioning and quick chilling between layers.
Variations to try
- Berry Swirl: Replace gel coloring with reduced strawberry and blueberry purées (see earlier reductions). Increase chilling time between layers by 5–10 minutes to account for the extra moisture.
- Patriotic Popsicles: Press alternating spoonfuls of the colored mixtures into popsicle molds, insert sticks, and freeze. Reduce the white portion slightly to keep layers balanced in molds.
- Chocolate Stripe: Stir 2 tablespoons sifted cocoa powder into one third of the base for a chocolate stripe—if cocoa dries the mixture, add 1 tablespoon sweetened condensed milk to restore creaminess.
- Mini Parfaits: Layer scoops with crumbled shortcake and fresh berries in small jars for a make-ahead dessert; serve within 24 hours for best texture.
Storage, freezing, and reheating
Store leftover no churn ice cream tightly wrapped in the freezer for up to 2 weeks for best texture. Use an airtight container with a piece of plastic pressed on the surface to minimize air exposure and ice crystals. This ice cream freezes well but will firm up over time; to serve, transfer to the refrigerator for 20–30 minutes or leave at room temperature 5–10 minutes before scooping. Avoid refreezing thawed scoops more than once—the texture degrades with repeated freeze-thaw cycles.
What to serve with no churn ice cream
Good pairings include: fresh berry shortcake for a 4th of July dessert, warm fruit crisps (serve a small scoop on each portion), individual brownies or blondies for a contrast of temperature and texture, or graham cracker crumbles and toasted nuts for crunch. For a picnic-friendly option, set out pre-scooped servings in small paper cups and top with fresh berries.
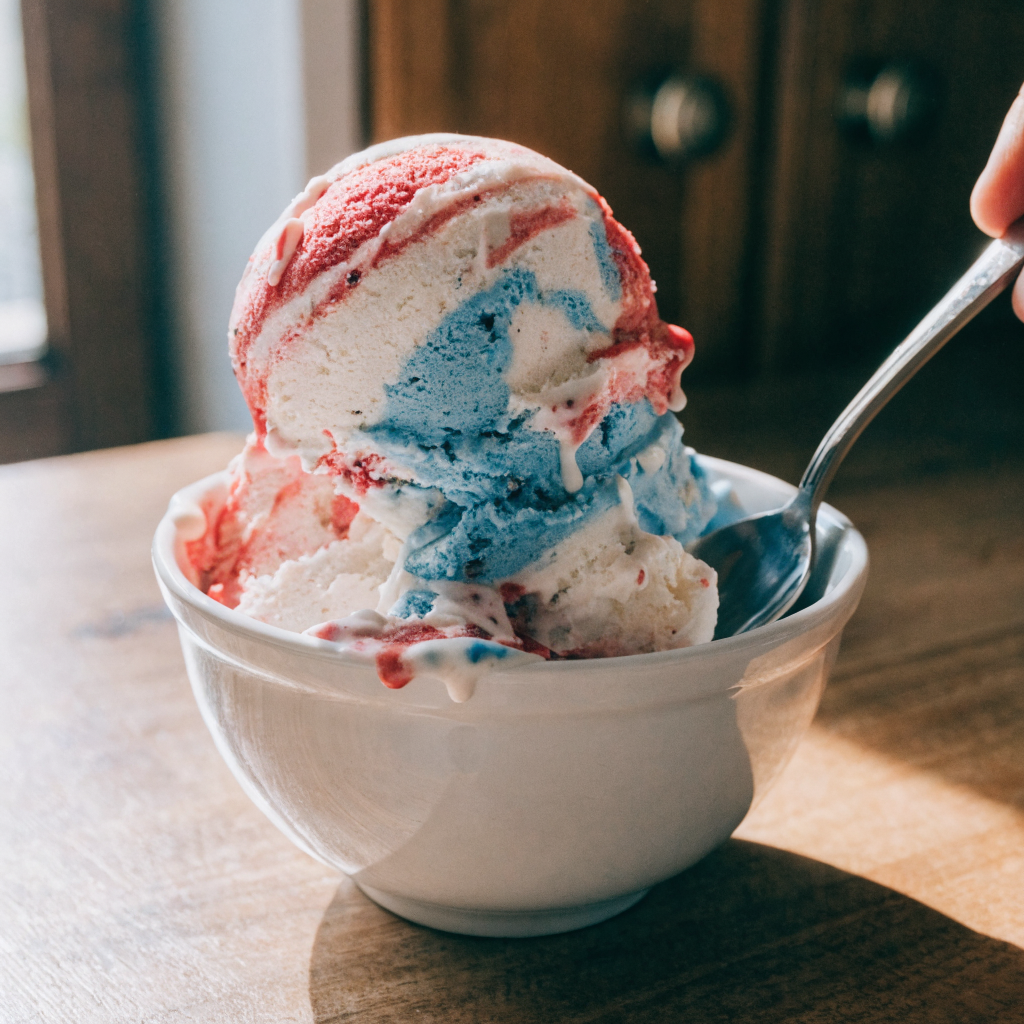
Patriotic No Churn Ice Cream (Red, White & Blue)
Ingredients
Equipment
Method
- Chill the mixing bowl and beaters in the refrigerator for at least 30 minutes and line a 9×5-inch loaf pan with plastic wrap.
- Whip 2 cups cold heavy cream on medium-high speed until medium-firm peaks form, about 3–5 minutes; in a separate bowl stir 14 ounces sweetened condensed milk with 1 teaspoon vanilla.
- Gently fold one-third of the whipped cream into the condensed milk to loosen, then fold in the remaining cream in two additions using a cut-and-fold motion until just combined.
- Divide the base into three nearly equal bowls (about 1 1/3 cups each). Add red gel color or reduced strawberry purée to one bowl and stir gently; add blue gel color or reduced blueberry purée to another bowl and stir gently; leave the third bowl plain for white.
- Spread a thin 1/2-inch layer of the red mixture into the prepared pan and smooth; freeze uncovered 15 minutes to set slightly, then add a 1/2-inch layer of white and chill 10 minutes, then top with the blue mixture and smooth.
- Cover the pan tightly with plastic wrap pressed onto the surface and freeze at least 6 hours or overnight until firm.
- Let the pan sit at room temperature 5–10 minutes before scooping or dip your scoop in hot water for easier, clean scoops. Serve with fresh berries or crumbled shortcake if desired.
Notes
Frequently asked questions
Can I use frozen fruit straight from the bag? Yes, but thaw and drain frozen fruit before reducing it; excess juice will thin the base and encourage ice crystals, so simmer briefly to concentrate color and flavor.
Why did my no churn ice cream get icy? Icy texture usually means too much free water; reduce added fruit juices, avoid liquid extracts, and press plastic wrap onto the surface before freezing to reduce air exposure.
Can I make this ahead for a party? Absolutely—make it up to 3 days in advance for best texture, or freeze up to 2 weeks. Let it rest at room temperature 5–10 minutes before serving for easiest scooping.
How do I get strong red and blue colors without artificial gel? Use reduced purées: simmer berries until thick and concentrated, then fold in small amounts. Natural colors will be subtler than gel but add real flavor.
Can I double the recipe? Yes, use a larger freezer-safe container (a 9×13-inch pan works) and increase chilling times between layers slightly; you may need to work in sections so layers set evenly.
Closing
This no churn ice cream balances ease with texture and presentation—by stabilizing whipped cream, portioning and chilling between layers, you get scoopable, festive red-white-and-blue results that are perfect for 4th of July gatherings and summer celebrations. I find a 5–10 minute rest at room temperature makes scooping effortless and keeps the colors crisp when serving to guests.

Leave a Reply